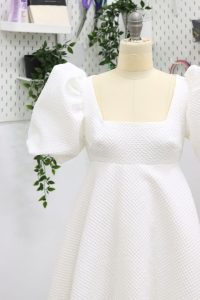
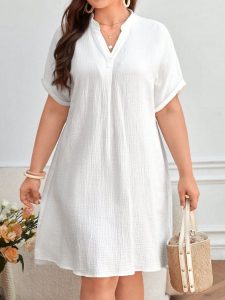
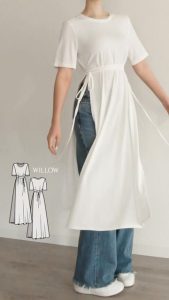
How to sew a dress? Creating your own dress can be incredibly rewarding. It allows you to express your unique style and find the perfect fit. This guide will walk you through the basics of sewing a dress, empowering you to bring your dressmaking dreams to life.
Gathering Your Supplies
Before you start sewing, it’s important to collect all the necessary tools and materials. Here’s a list to get you started:
- Sewing machine in good working condition
- Fabric scissors or rotary cutter
- Thread in a color that matches your fabric
- Straight pins
- Sewing gauge
- Iron and ironing board
- Fabric (amount will vary depending on the dress style)
- Dress pattern (your own design or store-bought)
Choosing the Right Fabric
The type of fabric you choose will significantly impact the look and feel of your dress. Consider these factors when selecting fabric:
Weight and drape:
Lighter fabrics like cotton or linen are perfect for summer dresses, while heavier fabrics like wool or velvet are better suited for colder weather. Drape refers to how the fabric falls and flows. Consider how you want the dress to move when choosing the drape.
Pattern or solid:
Fabric comes in a vast array of colors, patterns, and textures. Opt for a solid color for a classic look or a pattern for a bolder statement.
Selecting the Perfect Dress Pattern
Dress patterns provide a blueprint for constructing your garment. Here are some things to consider when choosing a pattern:
- Skill level: Beginner patterns typically have fewer pieces and simpler construction techniques. Choose a pattern that matches your sewing experience.
- Style: There are endless dress styles to choose from! Consider factors like dress length (midi, maxi, mini), sleeve style (strapless, short, long), and formality.
- Sizing: Double-check the pattern’s size chart to ensure you select the size that best suits your measurements.
Understanding Basic Sewing Techniques
Before diving into dress making, it’s helpful to master some fundamental sewing techniques. Here are a few key skills:
- Threading your sewing machine: Learn how to properly thread your machine with the appropriate bobbin tension.
- Straight stitching: This is the most common sewing technique used to join pieces of fabric together.
- Backstitch: Use backstitches to secure the beginning and end of your seams to prevent unraveling.
- Ironing seams: Ironing seams open or flat helps create a neat and professional finish.
Let’s Get Sewing!
With your supplies gathered and your chosen pattern at hand, it’s time to start sewing! Here’s a general roadmap for constructing your dress:
- Prepare the fabric: Wash and iron your fabric according to the care instructions to prevent shrinkage after sewing.
- Cut out the pattern pieces: Lay out the pattern pieces on your fabric and carefully cut them out using scissors or a rotary cutter.
- Mark seam allowances: Most dress patterns include seam allowances. Use a sewing gauge to mark these allowances on your fabric pieces.
- Pin and sew the bodice: Pin the bodice pieces together right sides facing and sew along the seam allowances. Repeat for any other bodice sections.
- Attach the skirt: Pin the skirt to the bodice, matching seams, and sew together.
- Finish the neckline and armholes: Depending on the pattern, you may need to hem or bind the neckline and armholes for a clean finish.
- Create hems: The final step is to hem the bottom of the dress to your desired length.
Customizing Your Dress
The beauty of sewing your own dress is the ability to personalize it! Here are some ways to add your unique touch:
- Embellishments: Add buttons, ribbons, or lace to elevate your dress.
- Pockets: Pockets are not only functional but can also add a stylish detail.
- Fabric choice: Play with different fabrics like lace or chiffon to create a unique look.
Sewing your own dress can be a fun and rewarding experience. By following these steps and unleashing your creativity, you can craft a dress that perfectly reflects your style. Remember, practice makes perfect! So, grab your sewing supplies and start stitching your way to a dressmaking masterpiece.

Following a Sewing Pattern
Sewing patterns provide a roadmap for constructing your garment, including step-by-step instructions and diagrams. Here are some tips for using a sewing pattern:
- Read the instructions carefully: Take time to understand each step before starting to sew. Pay close attention to seam allowances, notches, and any special techniques mentioned.
- Trace the pattern pieces: Many patterns recommend tracing the pieces onto paper before cutting into your fabric. This allows you to mark any necessary details and save the original pattern for future use.
- Label your fabric pieces: Once you’ve cut out the pattern pieces, label them according to the pattern instructions. This helps avoid confusion when assembling the dress.
Safety Tips
Sewing is a fun and rewarding hobby, but it’s important to prioritize safety while using sewing machines and other tools. Here are some safety tips to keep in mind:
- Stay alert and focused: Avoid sewing when tired or distracted.
- Keep your fingers away from the needle: Use a seam ripper to remove stitches instead of pulling them out with your fingers.
- Unplug the machine when threading or changing needles: This helps prevent accidental needle movement.
- Maintain your machine: Regularly oil your sewing machine according to the manufacturer’s instructions for smooth operation.
By following these tips and practicing basic techniques, you’ll be well on your way to creating your own beautiful dress! Remember, sewing takes time and patience. Don’t be discouraged if your first attempts aren’t perfect. The most important thing is to have fun and enjoy the process of creating something unique!

Before diving into dressmaking, it’s helpful to master some fundamental sewing techniques. Here are a few key skills to practice:
- Sewing straight lines: This is the foundation of many sewing projects. Practice stitching on scrap fabric to get comfortable controlling the sewing machine and keeping your lines straight.
- Piecing fabric: Learn how to sew two pieces of fabric together with a straight stitch and proper seam allowance.
- Clipping curves: When sewing curved seams, clipping small notches into the seam allowance helps the fabric lay smoothly and prevents bunching.
- Ironing techniques: Ironing as you sew helps create crisp seams and professional-looking finishes. Learn how to press seams open, flat, and to one side.


