
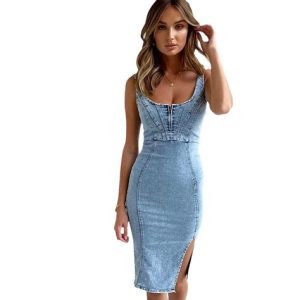
How to alter a dress? Do you have a dress in your closet that you love but doesn’t quite fit right? Maybe it’s a little too big or a little too small. Or, perhaps the style is a bit outdated. Before you cast it aside, consider altering it! With a few simple techniques and some basic sewing supplies, you can transform your dress into a garment you’ll love to wear again.
Assess the Fit
The first step is to assess how the dress fits you. Try it on and identify any areas that need adjustment. Here are some common alterations:
Length:
The dress might be too long or too short.
Body:
The dress might be too loose or too tight in the bust, waist, or hips.
Sleeves:
The sleeves might be too long, too short, or too tight.
Straps:
The straps might need to be adjusted to improve the fit and support.
Once you’ve identified the areas that need attention, you can decide on the specific alteration technique.

Simple Alteration Techniques
Here are some easy-to-do alteration techniques for common fit issues:
-
Shortening the hem: If the dress is too long, you can simply hem it to the desired length. This is a beginner-friendly alteration that can be done by hand or with a sewing machine.
-
Taking in the sides: If the dress is too loose overall, you can take in the side seams. This will bring in the dress at the bust, waist, and hips.
-
Bringing in the waist: For a more cinched waist, you can add darts at the waistline. Darts are triangular folds sewn into the fabric to create a closer fit.
-
Lengthening the straps: If the straps are too short, you can add fabric extensions. This can be done with a contrasting fabric for a fun design element.
There are many online tutorials and resources available that can provide detailed instructions for these alterations. Be sure to choose a technique that matches your skill level and the style of the dress.
Extra Touches for a Restyled Look
Beyond basic fit adjustments, alterations can also be used to completely revamp the style of your dress. Here are some inspirational ideas:
-
Change the neckline: The neckline can be altered to create a different look. For example, you could convert a scoop neck to a V-neck or a round neck to a halter top.
-
Add sleeves: If your dress is sleeveless, you can add sleeves to create a different look. There are many sleeve styles to choose from, such as cap sleeves, flutter sleeves, or long sleeves.
-
Embellishments: Adding embellishments like lace, ruffles, or buttons can take your dress from plain to fancy.
-
Shorten or layer over pants: If the dress is too long, you can shorten it to create a tunic or layer it over a pair of pants or leggings.
With a little creativity, alterations can transform your dress into a unique and stylish piece that reflects your personality.
Gathering Supplies and Getting Started
Before you start altering your dress, gather the necessary supplies. You’ll likely need sewing needles, thread, scissors, pins, a seam ripper (for taking out stitches), and a sewing machine (optional).
When making alterations, it’s always a good idea to start with small adjustments. Try on the dress after each step to ensure you’re happy with the fit before proceeding.
With a little patience and practice, you can master the art of altering clothes. So grab your favorite dress that needs some love, and breathe new life into it with a fun and creative alteration project!
Safety First!
Before we dive into specific alteration techniques, it’s important to prioritize safety. Sharp tools like sewing needles and scissors are involved, so let’s ensure we handle them properly:
-
Adult supervision: If you’re under 18, it’s important to have an adult present when using sewing tools. They can help you with tasks that might require more strength or control, like cutting through thick fabric.
-
Sharp object handling: Be mindful of sharp points on needles and scissors. Store them safely in a designated container when not in use. Always cut away from yourself to avoid accidental cuts.
-
Pinning: When pinning fabric, use straight pins with large heads for better gripping. Push the pin point through the fabric layers and then down into the flat part of the garment, not your finger!
Let’s get started on those alterations safely!

Planning Your Alterations
Once you’ve identified the areas that need adjusting, planning your attack strategy is key! Here are some tips:
-
Research online tutorials: There are many websites and video tutorials that can visually guide you through common dress alterations. Search for tutorials that match the specific alteration you want to make and your skill level.
-
Practice on scrap fabric: Before altering your actual dress, try out the technique on a scrap piece of fabric that matches the weight and material of your dress. This will help you get comfortable with the sewing technique and avoid making mistakes on your garment.
-
Start small and try on often: Especially when you’re a beginner, it’s better to make small adjustments and try on the dress frequently. This way, you can ensure you’re on the right track and avoid overdoing the alteration.
By planning your alterations carefully and prioritizing safety, you’ll be well on your way to transforming your dress into a garment you love!

Shortening the Hem (A Beginner-Friendly Alteration)
Let’s dive into a specific alteration technique: shortening the hem! This is a great option for a dress that’s just a bit too long. Here’s what you’ll need:
- Sewing supplies (needle, thread, scissors, pins)
- Iron (optional, but helpful for pressing seams)
- Ruler or measuring tape
- Marking tool (chalk, fabric pen)
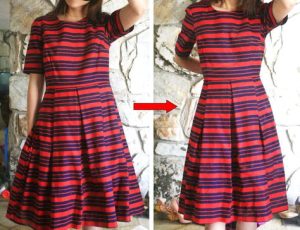
Shortening the Hem Step-by-Step:
-
Try on the dress and determine the new hem length. Mark the new hemline on the dress with your marking tool. You can stand on a flat surface and have a friend help you mark the even hemline.
-
Take off the dress and lay it flat on a work surface. Smooth out any wrinkles.
-
Fold the dress up based on the new hemline you marked. Ensure the fold is even all around the dress. Use pins to secure the fold in place.
-
Double-check the length: Try on the dress again with the pins in place to ensure you’re happy with the new hem length. Make any adjustments to the fold before proceeding.