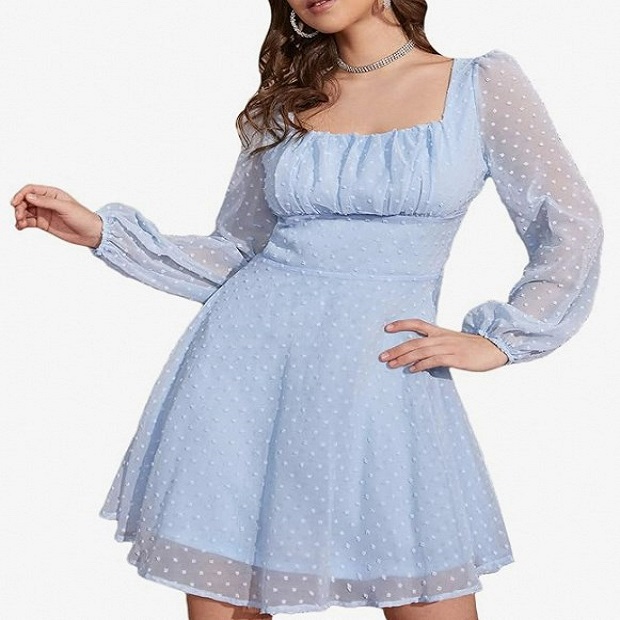
Pockets are incredibly useful! They add functionality to any outfit, allowing you to carry essentials like keys, a phone, or a wallet. But what if your favorite dress lacks pockets? Fear not! Adding pockets to a dress is a fun and relatively simple sewing project that can be completed at home.
This guide will walk you through everything you need to know about adding pockets to a dress, from choosing the right pocket design to sewing them on securely.
Selecting the Perfect Pocket
The first step is choosing the pocket type that best suits your dress and your needs. Here are some popular options:

In-seam pockets:
These pockets are discreetly hidden along the side seams of the dress. They are a great choice for dresses where you want the pockets to be subtle.
Patch pockets:
These pockets are sewn directly onto the outside of the dress. They come in various shapes and sizes, allowing for creative expression.
Welt pockets:
These pockets are more involved to create but offer a polished look. They are inset into the dress with a raised border.
Consider the style of your dress and the level of difficulty you’re comfortable with when choosing a pocket type.
Gathering Your Supplies
Once you’ve chosen your pocket design, gather the necessary materials:
-
Matching thread: Choose a thread color that matches the color of your dress fabric.
-
Fabric for pockets: Select fabric that complements your dress. You can use leftover fabric from the dress itself, a contrasting fabric for a pop of color, or even a patterned fabric.
-
Sharp scissors or rotary cutter: Use sharp tools for clean cuts.
-
Sewing pins: These will hold your fabric pieces in place before sewing.
-
Sewing needle: Choose a needle size appropriate for the weight of your fabric.
-
Sewing machine: A sewing machine will make sewing the pockets much faster and easier, but hand sewing can also be done for a more rustic look.
-
Ruler or measuring tape: You’ll need these to measure and mark fabric accurately.
-
Tailor’s chalk or fabric marking pen: Use this to mark cutting lines on your fabric.
-
Iron (optional): An iron can be helpful for pressing seams flat.

Understanding Basic Sewing Techniques (or Brushing Up!)
If you’re new to sewing, here’s a quick refresher on some essential techniques you’ll use for adding pockets:
Straight stitch:
The straight stitch is the foundational sewing technique used to join two pieces of fabric together and is considered the most basic and commonly used stitch in sewing. It is characterized by its simple and linear appearance and is ideal for securing seams, hems, and general construction of garments and fabric items. Whether executed by hand or with a sewing machine, the straight stitch creates a neat and uniform seam. The length and tension of the stitch can be adjusted to accommodate different types of fabric and sewing projects, offering versatility and adaptability. While the straight stitch is fundamental, its importance in sewing cannot be understated, serving as the building block for more complex stitch patterns and techniques. Its straightforward nature makes it accessible to beginners while remaining a staple for seasoned sewers in creating clean and professional finishes.
Backstitch:
The backstitch in sewing serves to provide a strong and secure reinforcement at the beginning and end of the sewing line. It effectively prevents the fabric from unraveling and ensures the long-term durability of the seam. By sewing a few stitches in reverse and then continuing forward, the backstitch locks the thread in place. This creates a sturdy and resistant bond. The backstitch is important for areas of high tension and stress, such as garment seams. Here, the risk of unraveling and breakage is greater. The backstitch is known for its ability to withstand everyday use and washing. This makes it an essential skill for any sewing project. It adds strength and longevity to the finished item and contributes to a professional and polished appearance. It reflects the attention to detail and quality workmanship of the sewer.
Serging or pinking shears:
These tools, such as pinking shears or sergers, can be utilized to help prevent fraying on raw fabric edges, but they are not essential. While they can be beneficial for creating a neat and professional finish, especially on fabrics prone to fraying, they are not a must-have for basic sewing projects. Through careful stitching and handling, you can minimize fraying without the use of these specialized tools.
There are many online tutorials in 2024 and resources available to learn basic sewing techniques in more detail.
Let’s Add Pockets!
With your chosen pocket design, supplies gathered, and basic sewing skills in mind, you’re ready to add pockets to your dress! Here’s a general guide, but remember to refer to specific instructions for your chosen pocket type:
-
Prepare your pocket fabric: Cut out two identical pieces of fabric according to the pocket pattern or dimensions.
-
(For in-seam pockets) Prepare the dress: Mark the location on the dress where you want the pocket to be. This is usually along the side seam, slightly below the waistline.
-
(For patch pockets or welt pockets) Create the pocket lining (optional): This step adds structure and a finished look to the pocket. Cut lining pieces slightly smaller than the pocket pieces and sew them together, leaving an opening for turning.
-
Assemble the pocket: Place the right sides of the pocket fabric pieces together (or the pocket fabric with the lining, if used). Pin them in place and sew around the edges, leaving the top opening unsewn. Clip the curved edges if necessary for a smooth look. Turn the pocket right side out and press flat.
-
Attach the pocket to the dress: Pin the pocket to the dress, aligning the raw edges and matching any side seams. Sew the pocket to the dress using a straight stitch.
-
Finish the opening: For in-seam pockets, sew the dress side seam closed, enclosing the top of the pocket opening. For patch pockets or welt pockets, fold the raw edge of the opening inwards and sew it closed to create a clean finish.

The Finishing Touches
Once you’ve attached the pockets to your dress, here are some finishing touches:
-
Reinforce stress points: Add a few extra stitches at the corners or ends of the pocket opening for reinforcement. This will help prevent tears or rips during use.
-
Press the seams: Use an iron to press the seams of your pocket flat. This creates a polished look and helps the pocket lay smoothly against the dress.
-
Try it on! Put on your dress and see how the pockets feel. Make any adjustments necessary for size or placement.
Embrace Your Creativity!
Adding pockets to your dress is a fun way to personalize your outfit and add functionality. Here are some inspirational ideas:
- Get creative with your pockets! Embellishing your pockets with buttons, ribbons, or other trims can add a unique and personalized touch to your garment. Consider attaching decorative buttons or using colorful ribbons to infuse character and individuality into your pockets, making them stand out and becoming a focal point of your design.
- Using contrasting fabrics to create patch pockets can introduce an exciting element of color or pattern to your dress. Mixing and matching different fabrics can add visual interest and make your pockets a statement feature, enhancing the overall aesthetic of your garment.
- Experiment with unconventional pocket shapes to bring a fresh and innovative look to your design. Move beyond traditional square or rectangular pockets and consider incorporating rounded shapes, angled pockets, or even whimsical heart-shaped pockets. These unconventional shapes can lend a playful and unique feel to your garment, allowing you to express your creativity and individual style.
With a little creativity, you can transform your dress. These helpful tips will help make it into a garment that’s both stylish and functional!
Sewing with Confidence!
Adding pockets is a fun way to modify clothes, but sewing can feel tricky at first. Here are some tips to build your confidence:
-
Start small: If you’re a beginner, consider practicing on scrap fabric before tackling your dress.
-
Take your time: Don’t rush! Careful sewing will lead to a neater and more durable finished product.
-
Don’t be afraid to rip out stitches: Mistakes happen! It’s easier to remove a few stitches and try again than continue with an error.
-
There’s no shame in hand-sewing: While a sewing machine makes things faster, hand-sewing can also create beautiful results.
There are many online tutorials and resources available to help you learn more about sewing techniques. With a little practice, you’ll be adding pockets to your clothes like a pro!