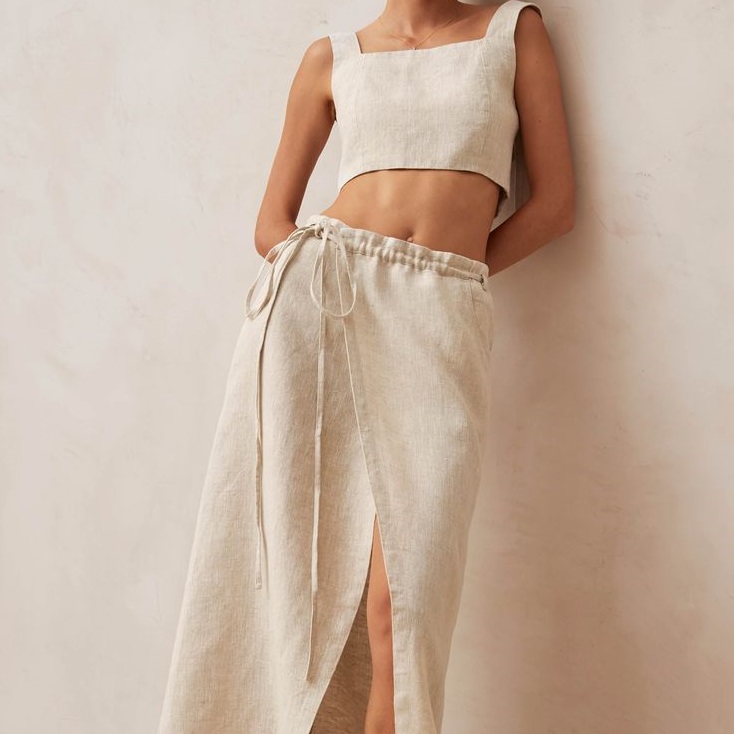
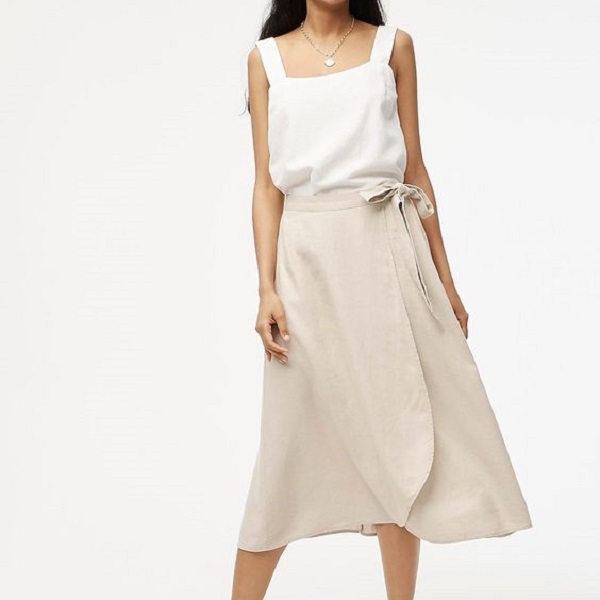
A wrap skirt is a versatile and flattering wardrobe piece that can be dressed up or down for various occasions. Its effortless elegance and adaptable fit make it a beloved garment for women of all ages and body types. While ready-made wrap skirts are readily available, there’s something uniquely special about crafting your own. Sewing your own wrap skirt not only allows for customization and a perfect fit but also empowers you with the skills to create a unique piece that reflects your personal style. Let’s embark on a step-by-step journey into the world of sewing a skirt, from choosing the perfect fabric to mastering the construction and adding those finishing touches.
Gathering Your Supplies: Essential Tools and Materials
Before you begin your sewing project, it’s important to gather the necessary tools and materials. This ensures a smooth and efficient sewing process and helps prevent any frustrating interruptions along the way.
- Fabric: The fabric you choose will significantly influence the look and feel of your wrap skirt. Opt for fabrics that drape well and complement your style.
- Lightweight Fabrics: For spring and summer, consider lightweight fabrics like cotton voile, rayon challis, or linen.
- Heavier Fabrics: For fall and winter, choose warmer fabrics like wool blends, corduroy, or even velvet.
- Sewing Machine (or Needle and Thread): A sewing machine will expedite the process, but if you prefer hand-stitching, a needle and thread will suffice.
- Scissors: A sharp pair of fabric scissors is essential for cutting your fabric with precision.
- Measuring Tape: You’ll need a measuring tape to take accurate measurements and ensure a perfect fit.
- Pins: Pins help secure the fabric pieces together before sewing.
- Iron and Ironing Board: An iron and ironing board will help you press seams and create a polished finish.
- Pattern or Template (Optional): If you’re new to sewing, a pattern or template can provide helpful guidance. However, you can also create your own pattern based on your measurements.
- Other Supplies: You may also need additional supplies like seam rippers, chalk or fabric markers, and interfacing (for added structure if needed).
Taking Measurements: The Foundation of a Perfect Fit
Accurate measurements are crucial for creating a wrap skirt that fits you beautifully.
- Waist: Measure the circumference of your natural waist, where you typically wear your skirts.
- Hips: Measure the fullest part of your hips.
- Skirt Length: Decide on your desired skirt length and measure from your waist to the desired point. Add a few inches to this measurement for seam allowances and hemming.
Measurement Tips
- Use a Flexible Measuring Tape: A flexible measuring tape allows for accurate measurement of curves and contours.
- Wear Comfortable Clothing: Wear clothes that fit snugly and won’t add bulk to your measurements.
- Assistance: If possible, ask someone to help you take your measurements for accuracy.
Pattern Creation or Selection: Mapping Out Your Design
Once you have your measurements, it’s time to create or select a pattern for your wrap skirt.
Commercial Patterns
You can find a variety of wrap skirt patterns at fabric stores or online. These patterns come with detailed instructions and often include different size options.
DIY Pattern
If you’re feeling adventurous or want a more customized fit, you can create your own pattern using your measurements.
Basic Wrap Skirt Pattern
A basic wrap skirt pattern consists of two rectangular pieces of fabric that overlap and tie at the waist. The size of the rectangles will depend on your waist and hip measurements, as well as the desired skirt length.
Pattern Considerations:
- Skill Level: If you’re a beginner, start with a simple pattern with minimal seams and details.
- Fabric Choice: Consider the drape and weight of your chosen fabric when selecting a pattern.
- Customization: You can customize the pattern to create unique features like pockets, a higher or lower waistline, or even a ruffled hem.
Sewing a wrap skirt is a fulfilling and creative project that allows you to add a unique and personalized piece to your wardrobe. With careful planning, the right materials, and a bit of sewing know-how, you can craft a beautiful skirt that flatters your figure and reflects your personal style.
Whether you’re a seasoned seamstress or a beginner taking your first stitches, the process of creating a wrap skirt is a rewarding one. So, gather your supplies, unleash your creativity, and enjoy the journey of crafting a garment that you’ll be proud to wear.
Sewing Your Wrap Skirt: Stitching it Together
Now that you have your fabric and pattern ready, it’s time to bring your wrap skirt to life with some sewing magic.
-
Sewing the Side Seams:
- Right Sides Together: Place the two skirt panels right sides together, aligning the edges.
- Pin and Sew: Pin the side seams, leaving an opening for the waistband on one side and the overlap on the other. Use a straight stitch or a zigzag stitch, following your seam allowance.
- Finish the Seams: Finish the raw edges of the seams using a serger, zigzag stitch, or pinking shears to prevent fraying.
-
Creating the Waistband:
- Cut the Waistband: Cut a long strip of fabric for the waistband, using your waist measurement plus seam allowances for the length and your desired waistband width for the height.
- Fold and Press: Fold the waistband in half lengthwise, wrong sides together, and press with an iron.
- Attach to Skirt: Pin the waistband to the top edge of the skirt, right sides together, and sew along the edge.
-
Attaching the Ties:
- Cut the Ties: Cut two long strips of fabric for the ties. The length of the ties will depend on your waist size and desired wrapping style.
- Fold and Press: Fold each tie in half lengthwise, wrong sides together, and press with an iron.
- Sew the Ties: Open up the folded ties and sew along the long edges, leaving one short end open.
- Turn and Press: Turn the ties right side out using a safety pin or a turning tool. Press them flat with an iron.
Sewing Tips:
- Choose the Right Needle and Thread: Select a sewing machine needle and thread appropriate for your chosen fabric.
- Test on Scrap Fabric: Practice your stitching on scrap fabric before sewing your actual skirt.
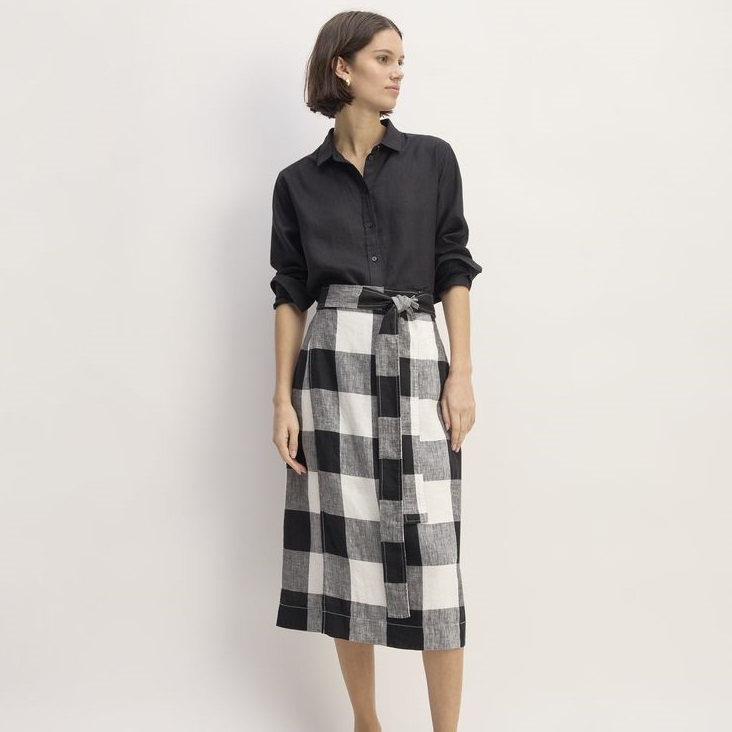
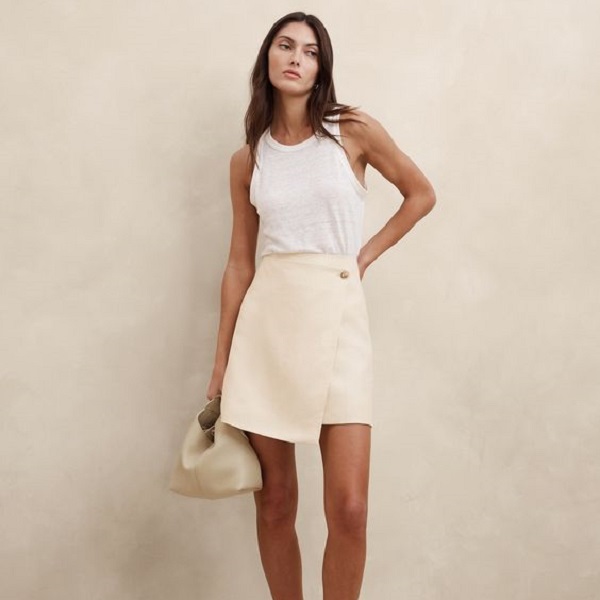
Styling Your Wrap Skirt: Unleashing Versatility
The beauty of a wrap skirt lies in its versatility. It can be dressed up or down and adapted to various occasions and personal styles.
-
Casual Chic: Pair your wrap skirt with a simple t-shirt or tank top and sneakers or sandals for a relaxed and effortless look. Add a denim jacket or a cardigan for a touch of warmth and style.
-
Workwear: Combine a wrap skirt with a blouse and a blazer for a polished and professional ensemble. Opt for a knee-length or midi skirt in a neutral color or a subtle pattern.
-
Evening Elegance: Choose a wrap skirt in a luxurious fabric like silk or satin and pair it with a silk camisole or a lace top. Add heels and statement jewelry for a glamorous and sophisticated look.
Styling Tips for Different Body Types
- Pear-Shaped: Choose an A-line wrap skirt that gently flares out from the waist to balance your proportions.
- Apple-Shaped: Opt for a wrap skirt with a high waistline to create definition and draw attention upwards.
- Hourglass: Embrace your curves with a wrap skirt that cinches at the waist and accentuates your natural shape.
- Rectangle-Shaped: Add volume and create the illusion of curves with a wrap skirt featuring ruffles or pleats.
Conclusion
Sewing a wrap skirt is a fulfilling and creative endeavor that allows you to add a versatile and stylish piece to your wardrobe. With careful measurements, the right fabric choice, and a bit of sewing know-how, you can craft a beautiful skirt that flatters your figure and reflects your personal style.
Whether you’re a seasoned seamstress or a beginner taking your first stitches, the process of creating a wrap skirt is a rewarding one. So, gather your supplies, unleash your creativity, and enjoy the journey of crafting a garment that you’ll be proud to wear.