
Preparing Your Dress for Alteration
Preparing your dress for alteration is crucial for a perfect fit. Before you start, ensure you have the right tools and understand your dress structure. How to alter a dress?
Tools and Materials Needed
To alter a dress, gather the following tools:
- Sharp scissors for precise cutting
- A seam ripper for undoing stitches
- Straight pins or safety pins for adjustments
- Measuring tape for accurate measurements
- Chalk or fabric marking pens for guidelines
- Sewing machine or needle and thread for alterations
- Iron and ironing board for pressing
Make sure you have these tools within reach before you begin.
Understanding Dress Structure Before Alterations
Understanding your dress’s design is vital. Pay attention to seams, darts, and hems. Know where each part connects, and how fabrics flow together. Look at how the dress is put together. Notice the stitching techniques used. This knowledge will help you keep the dress’s original look while making your changes. Recognize areas like the waist, bust, and hips. These are key to a great fit. Think about fabric type and dress style, too. Alterations can differ with stretchy materials, layered styles, or gowns with beading. Keep this in mind to avoid fabric damage or style loss during alterations.
With the right tools and a good grasp of dress structure, you’re set to start altering your dress for that perfect, tailored fit.
Shortening the Hem
To achieve the perfect length for your dress, here’s how to shorten the hem.
Measuring and Cutting Techniques
Start by wearing the dress with your preferred footwear. Pin the hem to the desired length. Next, remove the dress and lay it flat. Using a measuring tape, measure the excess length from the pinned line down. Mark this across the dress with chalk or a fabric pen. Now, add a hem allowance to this measurement. This is typically half an inch to an inch. Draw a second line to show where you’ll cut. Cut cautiously along this new line.
Sewing the New Hem
Turn the dress inside out. Fold the raw edge to the hem allowance line. Press this fold with an iron. Then fold again to the desired length line. Press again. This hides the raw edge. Pin the fold securely. Thread your sewing machine with matching thread. Start sewing close to the inner folded edge. Remove pins as you go. Continue around the hem. Once done, inspect your threads and trim any excess. Press the hem once more for a neat finish.
By accurately measuring and cutting, followed by careful sewing, you can expertly shorten a dress hem at home.
Taking in the Dress for a Better Fit
To tailor your dress for a snug, custom fit, follow these steps for taking in the seams.
Pinning and Adjusting Seams
Wear the dress inside out and stand in front of a mirror. Start pinning along the seams where you want to reduce width. For an even fit, pin from the bust to the hips. Keep pins parallel to the existing seams. Check the fit frequently as you pin. You may need someone’s help for hard-to-reach areas.
Next, take off the dress carefully, keeping the pins in place. Lay the dress flat and measure the pinned areas with a measuring tape. Ensure symmetry on both sides. Mark the new seam lines with chalk or a fabric pen.
Sewing Altered Seams
After adjusting the pins and marking, you are ready to sew. Re-thread your sewing machine with thread that matches your dress. Start at the top seam and sew along the chalked line. Continue to the end of the new seam. Do this for all altered seams on your dress.
Remember to remove the pins as you sew to avoid machine damage. Once you’ve sewn the new seams, use a seam ripper to remove the old stitches. Press the altered seams flat with an iron for a clean look.
By pinning accurately, cutting carefully, and sewing with precision, you can make your dress fit as if it was tailor-made for you.

Altering the Bodice Without Removing the Zipper
Sometimes you need to adjust the bodice without zipper removal. Alter the waist and bust, and keep lines smooth for a seamless fit. This can be tricky but here’s a guide.
Adjusting Waist and Bust without Zipper Removal
To alter the waist and bust, try the dress on and mark where it’s loose. Pinch and pin the excess fabric where the dress needs to be tighter. Work around the zipper, being cautious not to damage it. Draw new seam lines on the inside of the dress, and gradually taper them towards the zipper. Ensure both sides are symmetrical for an even look.
Use a sewing machine to stitch along these new lines after removing the pins. Check the fit again by trying the dress on. If it’s good, trim the excess fabric from the seams but avoid cutting too close to your stitching. This creates room without moving the zipper.
Ensuring Smooth Lines and Fit
For a snug fit, the bodice must have smooth lines. After adjusting the waist and bust, focus on the bodice-to-skirt seam. Ensure this transition has no puckers or gathers. If needed, slightly adjust the skirt’s gathers to align with your new waistline.
Check the dress’s sides too. Seams should flow evenly along your body curves. Use an iron to press newly sewn seams. This sets the stitches and reduces bulk. Lastly, when all adjustments are complete, do a final try-on. Confirm that the dress fits comfortably and flatters your figure perfectly.
By following these steps, you achieve a custom-fit bodice without the need to remove any zippers. Your dress will look polished and feel comfortable to wear for any occasion.

Working with Sleeves and Shoulders
How to alter your dress? When altering the sleeves and shoulders of a dress, precision is key for a comfortable fit. Here’s how you can make adjustments to sleeves and the shoulder area.
Shortening Sleeves
Start by trying on the dress and bending your arm slightly. Pin the sleeve at the length you prefer. Take the dress off and measure from the pinned point to the hem of the sleeve. Mark a straight line where you’ll cut, and remember to leave a seam allowance. Cut the excess fabric, fold over the cut edge to form a new hem, pin in place, and iron flat. Sew the new hem with a sewing machine or by hand. If the sleeve has a cuff or pattern, match these elements when measuring and cutting.
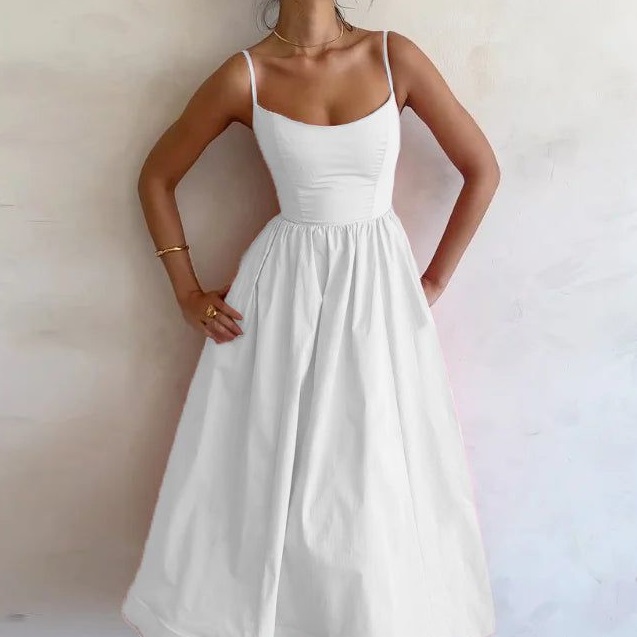
Adjusting Shoulder Straps
For dresses with shoulder straps, getting the length right is important for both look and comfort. If the straps are too long, the bodice can sag. Shorten them by pinning to the desired length while wearing the dress. Remove excess strap material through cutting, ensuring seam allowance remains. Reattach the strap by sewing the free end back to the inside of the dress. Be careful to keep the strap flat and free of twists. If the straps are adjustable, simply slide the buckle to shorten or lengthen them without cutting. With these alterations, the dress’s top will sit properly, enhancing the garment’s overall appeal.

Handling Specialty Fabrics and Styles
When it comes to dress alterations, certain fabrics and styles require extra care.
Altering Stretch Fabrics and Velvet
For stretch fabrics, use a ballpoint needle to prevent snagging. Test your stitch on scrap fabric first. Use a zigzag or stretch stitch to maintain elasticity. For velvet, avoid crushing the pile. Pin within the seam allowances. Hand stitch hems for invisibility. Always work with velvet on a plush surface.
Tips for Working with Layered and Gathered Dresses
With layered dresses, alter each layer individually. Match the seams and hemlines afterwards. For gathered styles, adjust the gathers evenly. Re-distribute fabric for a smooth fit. Keep the original feel by maintaining gather volume. Carefully mark and measure before cutting or sewing anything.
By paying attention to these specific guidelines, you can successfully alter specialty fabrics and complex dress styles without compromising their unique qualities.

Finishing Touches
How to alter your dress? To ensure your dress alteration looks professional, focus on the final details.
Pressing and Steaming for a Professional Look
After sewing, press and steam all seams and hems. Use a pressing cloth to protect delicate fabrics. Proper pressing gives your dress a crisp, tailored finish.
Final Fitting and Minor Adjustments
Try on your altered dress to check the fit. Adjust pins if needed and make small tweaks. Take the time to perfect your alteration for the best fit possible.
By carefully pressing and steaming, and addressing any last adjustments, your dress will have a customized, polished look.