
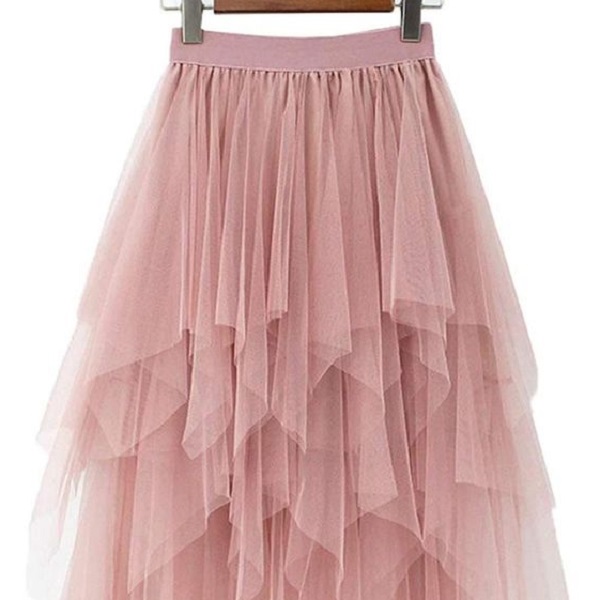
Tulle skirts evoke a sense of ethereal beauty and playful charm. They are versatile pieces that can be dressed up or down, making them perfect for various occasions, from weddings and proms to casual outings and costume parties. While ready-made tulle skirts are readily available, there’s something truly special about crafting your own. In this comprehensive guide, we will embark on a journey into the world of DIY tulle skirts, exploring different techniques, materials, and creative possibilities to help you create a unique and stunning skirt tailored to your style.
Embracing the Magic of Tulle: Understanding the Fabric
Before diving into the DIY process, let’s get acquainted with tulle, the star material of this project. Tulle is a lightweight, fine netting fabric often made from nylon, silk, or rayon. It comes in various colors and levels of stiffness, allowing for a wide range of creative expressions. Tulle’s delicate and airy nature makes it perfect for creating voluminous and whimsical skirts.
Gathering Your Supplies: Essential Tools and Materials
To embark on your DIY tulle skirt adventure, you’ll need to gather some essential tools and materials:
-
Tulle Fabric: Choose the color and stiffness of tulle that suits your desired look. The amount of tulle required will depend on the desired fullness and length of your skirt.
-
Elastic Band: Select an elastic band that is wide enough to comfortably fit around your waist and provide a secure hold.
-
Scissors: A sharp pair of scissors is crucial for cutting the tulle accurately and efficiently.
-
Measuring Tape: Use a measuring tape to measure your waist and determine the desired length of your skirt.
-
Safety Pins or Fabric Clips: These will be helpful for securing the tulle strips to the elastic band during the assembly process.
-
Optional Materials: Depending on your chosen design, you may also need additional materials such as ribbon, lace, sequins, or fabric glue.

DIY Tulle Skirt Techniques: Unleashing Your Creativity
There are several techniques you can use to create your DIY tulle skirt, each offering a slightly different look and level of complexity. Let’s explore some popular methods:
1. The Classic Knotted Tulle Skirt
This is a beginner-friendly technique that involves tying tulle strips onto an elastic waistband. It’s a simple yet effective way to create a full and fluffy tulle skirt.
-
Measure and Cut: Measure your waist and cut the elastic band to size, leaving a slight overlap for sewing the ends together. Cut the tulle into strips that are twice the desired length of your skirt.
-
Tie the Tulle: Fold each tulle strip in half and tie it onto the elastic band using a simple lark’s head knot. Repeat this process, placing the knots close together until the entire waistband is covered.
-
Fluff and Trim: Once all the tulle strips are attached, fluff the skirt to create volume and trim the ends to achieve your desired length.
2. The Gathered Tulle Skirt
This technique involves gathering the tulle fabric and sewing it onto an elastic waistband. It creates a more structured and polished look compared to the knotted method.
-
Prepare the Tulle: Cut the tulle into long strips that are several times the width of your desired skirt circumference.
-
Gather the Tulle: Use a sewing machine or hand-stitch a gathering stitch along the top edge of each tulle strip. Pull the gathering threads to create gathers until the width of the tulle strip matches the width of the elastic waistband.
-
Sew to the Waistband: Pin or clip the gathered tulle strips to the elastic waistband, ensuring they are evenly spaced. Sew the tulle to the waistband using a sewing machine or a strong hand-stitch.
-
Finish the Skirt: Trim any excess tulle and sew the ends of the elastic band together to complete the skirt.
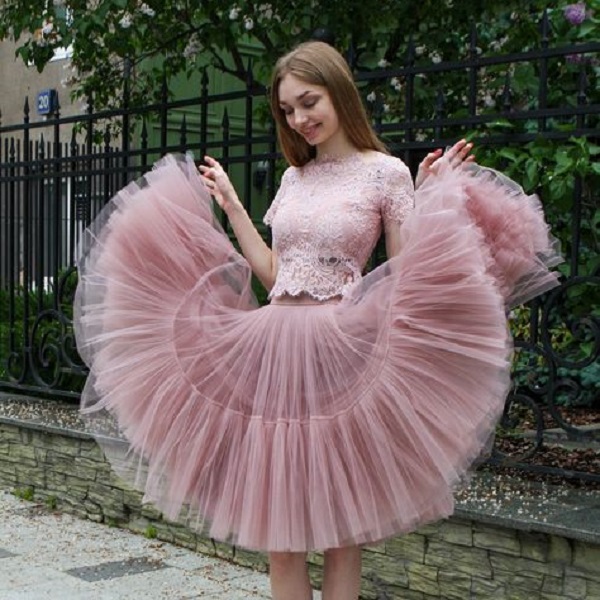
3. The Layered Tulle Skirt
For a more dramatic and multi-dimensional look, consider creating a layered tulle skirt. This technique involves attaching multiple layers of tulle to the waistband, each with a slightly different length.
-
Measure and Cut: Measure your waist and cut the elastic band to size. Cut the tulle into strips of varying lengths, with each layer being slightly shorter than the one below it.
-
Attach the Tulle: Use either the knotted or gathered technique to attach the tulle strips to the elastic waistband, starting with the longest layer and working your way up to the shortest.
-
Fluff and Adjust: Once all the layers are attached, fluff the skirt to create volume and adjust the layers as needed to achieve your desired look.
Creative Variations: Adding Your Personal Touch
Now that you’ve mastered the basic techniques, it’s time to unleash your creativity and add your personal touch to your DIY tulle skirt. Here are some ideas to inspire you:
-
Ombre Effect: Use different shades of tulle to create a beautiful ombre effect, gradually transitioning from one color to another.
-
Glitter and Sparkle: Add some sparkle and shine to your skirt by incorporating glitter tulle or embellishing the waistband with sequins or beads.
-
Lace and Ribbon Accents: Sew or glue lace or ribbon along the hemline or waistband of your skirt for an elegant and feminine touch.
-
Mix and Match Fabrics: Combine tulle with other fabrics like satin or chiffon to create a unique and textured look.
-
Add a Train: For a truly dramatic effect, add a detachable train to your tulle skirt using extra tulle fabric.
DIY tulle skirts are a wonderful way to express your creativity and create a unique piece that reflects your personal style. With a few simple materials and techniques, you can craft a stunning skirt that will make you feel like a princess.
So, gather your supplies, unleash your imagination, and embark on a tulle-filled adventure! Whether you’re creating a skirt for a special occasion or simply want to add a touch of whimsy to your wardrobe, a DIY tulle skirt is a project that is both rewarding and fun.
Troubleshooting and Tips: Ensuring a Successful DIY Tulle Skirt
While crafting a DIY tulle skirt is a fun and rewarding experience, it’s not without its challenges. Here are some troubleshooting tips and tricks to ensure your project is a success:
-
Tulle Tangles: Tulle can be prone to tangling, especially when working with large quantities. To prevent this, carefully roll or fold the tulle before storing it or working with it. You can also lightly mist the tulle with water to reduce static and make it easier to handle.
-
Uneven Knots or Gathers: Take your time and ensure each knot or gather is evenly spaced and securely tied or sewn. If you notice any inconsistencies, simply untie or unpick the affected area and redo it.
-
Elastic Band Too Tight or Loose: Measure your waist carefully before cutting the elastic band to ensure a comfortable and secure fit. If the waistband is too tight, you can add an extra piece of elastic or replace it with a larger one. If it’s too loose, you can shorten it by sewing a new seam.
-
Tulle Fraying: Some types of tulle may fray easily, especially when cut. To minimize fraying, use sharp scissors and consider sealing the edges of the tulle strips with a fabric sealant or by lightly singeing them with a flame.
-
Lack of Volume: If your skirt lacks volume, try adding more tulle strips or using a stiffer tulle fabric. You can also layer different lengths of tulle to create a more dramatic and voluminous effect.
Conclusion: Embrace the DIY Tulle Skirt Journey
DIY tulle skirts are a testament to the power of creativity and resourcefulness. By following these tips and techniques, you can craft a unique and stunning skirt that reflects your personal style and adds a touch of magic to any occasion.
Remember, the beauty of DIY projects lies in the journey as much as the final product. So, embrace the process, experiment with different ideas, and most importantly, have fun creating something truly special and unique. Happy crafting!