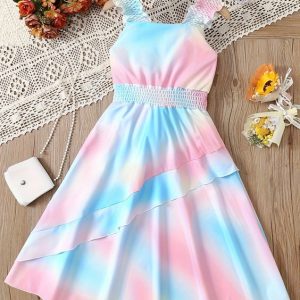
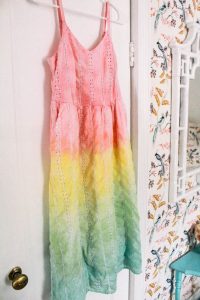
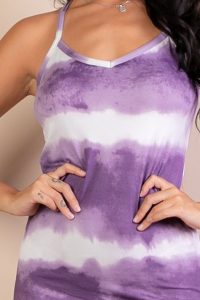
How to dye a dress? Do you have a dress in your closet that you love the style of, but the color is no longer your favorite? Maybe it’s faded over time or you just want a change. Instead of tossing it out, consider dyeing your dress! Dyeing clothes is a fun and creative way to refresh your wardrobe and give old garments new life. This guide will walk you through the process of dyeing a dress at home, step-by-step.
Before You Begin: Safety Precautions
Dyeing can be messy, so it’s important to take some safety precautions before you begin:
Wear gloves:
Dyes can stain your skin. Wear rubber gloves to protect your hands throughout the dyeing process.
Protect your workspace:
Cover your work surface with plastic sheeting or old newspapers to prevent spills and stains.
Work in a well-ventilated area:
Open windows or use a fan to ensure good ventilation while dyeing. Dyes can have strong fumes.
Be mindful of disposal:
Dispose of leftover dye and used materials responsibly. Many communities have specific guidelines for hazardous waste disposal. Check with your local waste management service for instructions.
Gathering Your Dyeing Supplies
Here’s what you’ll need to dye your dress:
- Fabric dye: Choose a dye that is compatible with the fabric of your dress. Different fabrics require different types of dyes. Look for the fabric content label on your dress and choose a dye accordingly.
- Large pot or bucket: You’ll need a container large enough to completely submerge your dress in the dye solution.
- Spoon or stirring stick: A long spoon or stirring stick is needed to stir the dye bath and move your dress around.
- Salt (optional): Salt can help the dye adhere to the fabric more evenly. Check the dye instructions to see if salt is recommended for your chosen dye.
- Rubber bands (optional): Rubber bands can be used to achieve certain tie-dye effects, if desired.
Preparing Your Dress for Dyeing
- Wash your dress: The first step is to wash your dress in warm water with laundry detergent. This removes any dirt or oils that might prevent the dye from adhering evenly. Skip fabric softener, as it can also affect dye absorption.
- Dry your dress completely: Make sure your dress is completely dry before dyeing. Damp fabric will not absorb dye evenly.
Dyeing Your Dress: Step-by-Step Guide
-
Fill your pot or bucket with water: Follow the dye instructions for the amount of water needed. Generally, you’ll want enough water to completely submerge your dress.
-
Heat the water: Heat the water to the temperature specified in the dye instructions. Do not allow the water to boil.
-
Add the dye: Slowly add the dye to the hot water and stir well to dissolve it completely.
-
Add salt (optional): If salt is recommended for your dye, add it now and stir to dissolve.
-
Add your dress: Carefully place your dress in the dye bath and stir gently to ensure even saturation.
-
Maintain dye temperature: Keep the dye bath at the recommended temperature for the specified amount of time. The dye instructions will provide specific timings for achieving the desired color intensity.
-
Stir occasionally: Throughout the dyeing process, stir your dress gently in the dye bath to ensure even coloring.
-
Rinse your dress: Once the dyeing time is complete, carefully remove your dress from the dye bath and rinse it thoroughly with cool water until the rinse water runs clear.
-
Wash your dress again: Wash your dyed dress in warm water with laundry detergent to remove any excess dye. You can wash it alone or with similar colors.
-
Dry your dress: Hang your dress to dry in a cool, well-ventilated area. Avoid direct sunlight, as this can cause the color to fade.
Adding Creativity with Tie-Dye Techniques (Optional)
Tie-dyeing is a fun way to add patterns and designs to your dyed dress. Here are some basic tie-dye methods:
- Rubber band method: Use rubber bands to create sections or stripes on your dress before submerging it in the dye bath. The areas covered by the rubber bands will resist the dye and remain lighter.
- Scrunch method: Scrunch your dress randomly in your hands before submerging it in the dye bath. This creates a more splotchy, marbled effect.
There are many online tutorials and resources available that demonstrate various tie-dye techniques in more detail.
Adding Flourishes: Embellishments for Your Dyed Dress (Optional)
Dyeing your dress is a great way to refresh its look, but you can take it a step further by adding some embellishments! Here are some ideas to get your creative juices flowing:
- Buttons: Swap out the existing buttons for contrasting or colorful buttons to add a pop of personality.
- Ribbons: Sew or tie ribbons around the waistline, neckline, or hem for a touch of elegance.
- Lace: Add lace appliques or trim to create a vintage or romantic look.
- Embroidery: If you’re feeling crafty, try hand-embroidering a design or pattern onto your dress.
- Fabric paint: Once your dress is dry, consider using fabric paint to add stencils, stripes, or other designs.
Remember: When adding embellishments, be sure to choose materials that complement the dyed fabric and your overall design vision.
The Joy of Upcycling: Giving Clothes New Life
Dyeing your dress is a form of upcycling, which is the process of transforming unwanted items into new and useful products. By giving your dress a new lease on life through dyeing, you’re not only refreshing your wardrobe but also reducing textile waste.
Upcycling is a fun and sustainable way to express your creativity and personalize your belongings. So next time you have a garment you’re tired of, consider dyeing it instead of throwing it away!
I hope this guide has empowered you to dye your dress with confidence and unleash your creativity!

Troubleshooting Your Dyed Dress (Optional)
Even with careful planning, sometimes things don’t go exactly according to plan during the dyeing process. Here are some common troubleshooting tips for dressing mishaps:
-
Uneven dye: If your dress has dyed unevenly, this might be due to improper stirring or not fully submerging the fabric. If the color difference is minor, you can try re-dyeing the dress using the same color to achieve a more even saturation.
-
Lighter than expected color: If the final color is lighter than you desired, you can try re-dyeing the dress for a longer duration or using a slightly darker shade in the second attempt.


